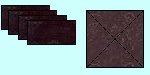
1. From the black background fabric, cut
four
2 1/2 by 4 1/2 inch rectangles and
one 5 1/4 inch square.
Cut the square diagonally twice to form
four quarter-square
triangles.
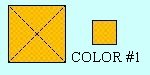
2. From the first fabric, cut one 5 1/4 inch square
and one 2 1/2 inch square. Cut the larger square diagonally
twice to form four quarter-square triangles.
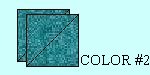
3. From the second fabric, cut two 4 7/8 inch squares.
Cut each of the squares diagonally once to form
four half-square triangles.
Sewing Directions
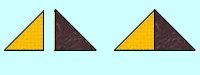
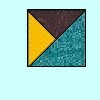
4. With right sides together, sew the four color #1 quarter-square
triangles to the four black quarter-square triangles using a 1/4-inch
seam allowance. Match the seams up in such a way that the finished
pairing looks like that in graphic 4. The long edges of the
triangle should face out, and the black triangle should be on the right side
when finished. Press seams toward the black side. You will end
up with four pieced triangles.
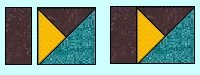
5. Refering to graphic 5 for placement, sew one color
#2 triangle to one of the triangle sets from step 4. You should end
up with four pieced squares.
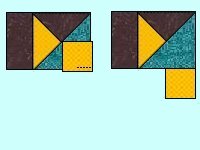
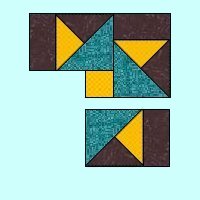
6. Add each of the black rectangles to the left side of the
pieced squares from step 5 by sewing the long edge of the rectangle to the
long side of the color #1 triangle.
7. Here's the tricky part! Line up the small color #1
square (right sides together) with the bottom right hand corner of one of
the sets from step #6. Then sew a 1/4 inch seam for HALF the
length of the small square starting at the right side and ending HALFWAY
through the square and BACKSTITCH.
Refer to graphic 7. Press seam toward the small square.
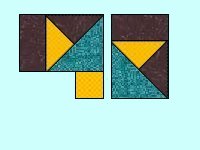
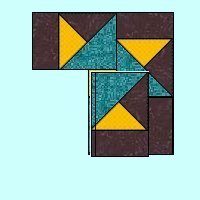
8. Line another pieced rectangle up with the right side of
the piece created in the last step and sew. (see graphic 8)
Press seams toward the center.
9. Similar to step 8, line another pieced rectangle up with
the bottom side of the piece created in the last step and sew. (see
graphic 9). Press seams toward the center.
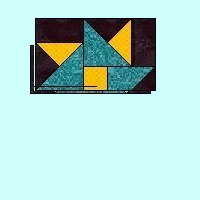
10. Here's another tricky part... line the last pieced
rectangle up with the last unfinished side of the block Because you
only sewed half a seam length in step #7, you can now sew the entire seam
length of this last rectangle. (Refer to graphic 10) Press seams
to the center once again.
11. Lastly, fold the bottom half of the block up so that the
unfinished seams match. Starting with where the stitching from step
#7 ends, BACKSTITCH and continue finishing this last seam to the end
of the square.
(see graphic 11) Press seam to the center to finish the block.
Your completed unfinished block will measure 10 1/2 inches.
10 inches after sewn into a quilt!